On a blog I am currently doing design work on I we had a problem with the size or length of both the blog archive and labels gadgets.The blog has being going for a number of years posting daily so the archive is huge and the author has about 100 labels.This of course means that the Labels gadget and blog archive gadgets are very long thus taking up a lot of space.
Now you could display the archive and Labels as a drop down but the owner of the blog wanted to leave them as lists, they felt the readers used the lists to navigate the blog.The solution I came up with was to place the archive list gadget and Labels gadget within a scroll box and I was (as was the blog owner) very happy with the results.In this post I am going to show you exactly how I did it, and it only takes a line of code.
If your not familiar with the Blog archive/Labels gadgets you can add them to your blog by going to the layout page, clicking add a gadget then scroll to find each.
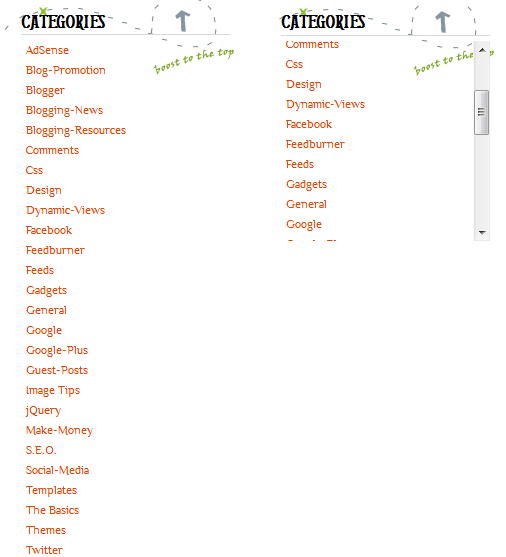
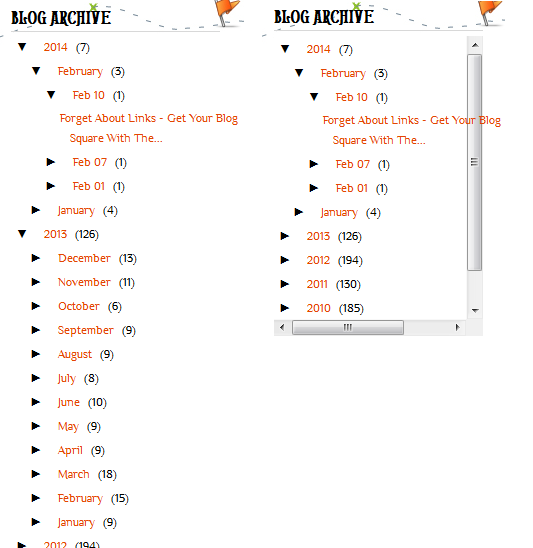
I don’t have a live demo for this one but you can see the difference in the screenshots below :
Labels In A Scroll Box Before After :

Archive In A Scroll Box Before After :

Tutorial
Step 1. – In Your (New Design) Blogger Dashboard Click The Drop Down Menu For Your Blog > Choose Customize > Advanced > Add Css, as shown in the video below.
Step 2. Copy and Paste the following code into the Css Section then click Apply To Blog.
(Sometimes the Apply To Blog button can not be clicked.If so click just after the code you added and press space then apply.)
Code For Labels :
#Label1 .widget-content{height:200px; width:auto;overflow:auto;}
Code For Archive :
#BlogArchive1 .widget-content{height:200px; width:auto;overflow:auto;}
OK that’s it two neat Blogger tricks, Drop your comments and questions below.

Author – Paul Crowe is the owner and main author of Spice Up Your Blog.Paul lives in Ireland, has been blogging since 2006 and writing Spice Up Your Blog since 2009.You can find him in the usual social networks.


